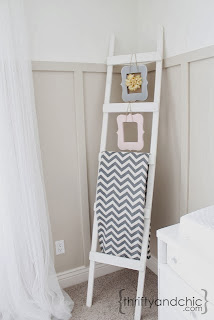
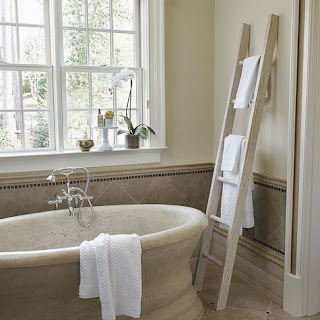
Over the summer, I became obsessed with this decorative ladder trend (is it still a trend?) and after weeks of online shopping failures, decided to try and make one on my own. Much to my surprise, it was a lot easier than I thought it would be.
Here are some of the photos that inspired my decision:
I love the idea of using a decorative ladder for towels, but there isn't enough space in our bathroom so my plan was to make one for the living room to hold magazines and blankets. I bought all of the materials from Home Depot and ended up spending around $40, which, compared to buying one, is really inexpensive. I will now attempt a step by step ladder building tutorial. Bear with me as this is my first one. They will get better...promise!
Let's get started, shall we?
Materials:
- two 7' boards. (Mine were about 4" wide I think, but width is entirely up to you)
- five 1" dowels (I wanted the ladder to be wider at the bottom so I ending up taking an inch off each dowel. The bottom is 22" and the top one is 18")
- one 1" wide bit
- can of miniwax in ebony stain (if desired)
- can of white paint (if desired - it doesn't matter which one. I'll leave that up to you)
- paint brushes
- guerrilla glue (if you have the patience)
- super glue (if you are like me and don't want to wait forever for it to dry)
- sand paper (if desired)
The Process:
Step One - starting from top, I measured (and marked) 12" between each dowel. This will leave about 2" of space at the bottom without any dowels. If you want more space in between your dowels and less space on the bottom I recommend spacing the dowels 14" or 15" apart.
Step Two - once I measured where the dowels would go, I drilled 1/2" holes using the 1" wide bit. (Be careful not to drill through the board!)
Step Three - Arrange the dowels in the correct order. Put a dab of super glue in the bottom drilled hole and place the dowel in the drilled hole. Repeat all the way up the ladder.
Step Four - *This step needs to be done quickly. It is possible to do alone, but not recommended* Put super glue in ALL of the drilled holes on the other side of the ladder and quickly and carefully line up the other side of the ladder and push the dowels into the glue. Warning: lining them up may be difficult.
Alternative: If you have the patience you can replace with Gorilla Glue, but make sure you have something to keep both sides of the ladder and dowels connected while it dries.
Unfortunately I don't have pictures of this process because I did it alone and it was a time sensitive step, but here are some pictures of the finished (pre-stained/painted) ladder.
Step Five - This part can be omitted if you want the plain pine look. I knew I wanted it to be grey(ish) so I chose to use a dark stain (miniwax in ebony). Since it's a dark stain, I only used one coat.
Step Six - Once the stain is on, I would wait about an hour before applying paint. Since I wanted the grey(ish) distressed look, I diluted white paint with water (about 1 part paint to 1 part water). I lightly brushed the diluted white paint all over the ladder. You can put as much or as little paint as you want. I added about 2 light coats.
Step Seven - If you want a more distressed look, you can lightly sand certain parts. I did not do this step, because it looked distressed enough from the diluted paint, but it's an option!
Step Eight - Always enlist the help of your pets!
Step Nine - Adorn your ladder with magazines, blankets, towels...whatever you want!
Here are some finished pictures of the ladder.
Let me know what you think!
XX,
W


I love the way it turned out !
ReplyDeleteJan!!! Thank you so much!
ReplyDelete