Wednesday, March 26, 2014

Oh, what's in a name?

Short answer....everything! Long answer, the reason for my extended hiatus this past week. You see, I am starting an Etsy shop and it has proven to be way more work than originally anticipated. Is it because I am a perfectionist??...me thinks so! I had hoped to launch my Etsy shop (where I will sell homemade soy candles) last weekend. I went to Michaels to buy some supplies to make labels and decorate the jars, but ended up being really unimpressed with the outcome. I was just not satisfied with the look or the name of the candle shop. I tried to make the shop name connect to this blog by calling it "Winks Wicks", but I could not say the name with a straight face, especially after my aunt said it sounded like "Winks (insert male private part name here)". No, these are not erotic candles....just family friendly soy candles. I also, was not crazy about the hand written labels. While I want them to look handmade, I also want them to look professional. It pains me to share these pictures with you of the original look because it is just so bad! But, in the name of all that is candle making problems, I present to you, my sweet non-judgmental readers, candle prototype take one.


While it could be worse, I just wasn't impressed with my work or the name so back to the drawing board I went. I ruminated on the design and the name for a couple of days until inspiration struck me while I was taking a bath. This may seem funny to some of you, but I find a lot of my best ideas come to me while I am scrub-a-dub-dubbin' in the tub. I love the little coastal town we live in. Unfortunately, our days here are numbered so what better way to always have a piece of it with me by naming my candle company after the town? I decided on the name "Montara Candle Co." and I could not be happier with the name. I just custom ordered some custom labels, which proved to be a whole other drama (just ask my wife - I think she almost killed me after the 20th photo text yesterday). Below are photos of the main contenders. 

Contender 1

Contender 2

Contender 3

Contender 4

Which one did I pick? Well, you will have to wait until the candle reveal next week :)

xx

W

Monday, March 10, 2014

Part 1: Chair Reupholstery

Happy Monday all! Man on man…let me tell you, I had NO idea what I was getting myself into. I have never reupholstered anything before so I was unaware how challenging this project would be. 

My wife and I have been wanting to reupholster this chair for a while. When I bought it 5 years ago, I was in love with the crazy floral print, but as the years went by, I regretted going for such a bold pattern. It no longer matched any of our decor and needed to go.

Chair: BEFORE

Don't get me wrong, at one point in time during my Anthropologie obsession, I thought this print was the coolest thing in the world; however, as times have changed so has my style.

Yesterday, Brooke and I went to JoAnn's Fabrics with our 40% off coupons to search for our new fabric. This step has been the most fun so far. Here are the contenders…

I LOVE the Ikat Design! 
I love the gray and the simplicity of this print
I really loved this pattern, but not the
color….we wanted a gray print
This was Brooke's pick. I wasn't too big a
fan of the color, but I do like the pattern

Which one did we choose?
We went with the Ikat print! We also wanted to find a dark grey fabric to reupholster our ottoman. We ended up picking one the same color as the dark gray in the ikat print above. 

Once we brought the prints home, it was time to get to work.

Materials

*As we continue through this process, I may add some more materials*

- fabric of your choice (we got 4 yards)
- phillips head screw driver (to remove the legs of your chair)
- flat head screw driver (to remove the staples)
- staple gun
- pliers
- fabric scissors
- sewing machine (not necessary)

The Process:

1. The first thing you should do is remove the legs of your chair. We didn't have a long enough screw driver so Brooke went out and bought one (THANK YOU!)

Brooke saves the day by purchasing
a long screw driver!

2. Flip your chair upside down and, using the flat screw drive and pliers, start removing all of the staples. This is a long and tedious process.


We only had one flat screw
driver so I got creative

Once I removed the staples from the bottom
cover, there were move underneath


3. As you remove the staples just keep peeling off the fabric. Be careful to only peel off the fabric and not the foam as you will need to upholster over the foam.


This is where we left off. Tonight I am going to cut out the new fabric. Wish me luck!

xx,

W

Friday, March 7, 2014

DIY Bookshelf Stenciling

Happy Friday all! Today i'm going to talk about a project I completed this past fall. I love the way stenciled book cases look, and ever since I bought this bookshelf a few years ago, I have been dying to give it a makeover.

source
source
It's just so boring! I perused the internet for some inspiration and found these photos.


source
source
After doing some research, I decided on doing a Moroccan trellis (or quatrefoil as some people call it) pattern. To begin, I found a free stencil online. I can no longer locate the stencil, unfortunately, but a simple google search will bring up many free ones. 

* FYI, i'm sure there are more efficient ways to complete this project *

Materials:
  • white spray paint
  • a small can of paint in the color of your choice
  • small paint brushes
  • card stock
  • pencil
  • stencil
The Process:
1. I measured the back of the bookcase, went to home depot and had them cut a piece of plywood according to the measurements.
2. Once I got home I spray painted the plywood white and waited about 2 hours for it to dry.
3. While the plywood was drying I located and cut out a stencil.

4. Once the plywood was dry I traced the stencil onto the plywood. This process was SO time consuming. I would highly recommend pouring yourself a glass of wine and putting on some music or trash tv to help break up the monotony :-)
5. Once I had stenciled a row, I began to fill in the stenciled areas with paint.

* Please ignore the bubbles. There was an issue with the spray paint. I had to go over the bad areas with white paint later in the process.*

6. Continue with this process until you're done stenciling and painting.
7. Once that is done, nail it to the back of your bookshelf and you're done!

my cute wife and my progress
this took FOREVER!

making progress
recognize the ladder? ;)
close up
it's finished!
 
That's all I have for you today! As always, let me know what you think!

Have a good weekend :)

XX,

W

Wednesday, March 5, 2014

Ikea Hack: FÖRHÖJA Kitchen Cart

When Brooke and I moved to our little bungalow on the beach, we had to make some sacrifices. One of those being the lack of an actual real kitchen (no oven or stove top). As she is a student and I am a teacher, the rent in San Francisco was becoming too much for us and we couldn't continue to compete with those dot-commers. That being said, I absolutely love our little home and take much pride in all that we have done decoratively. 

I have had this Ikea cart since I moved to San Francisco 5 years ago (oh my god has it been that long?), but was never really into the plain pine look of it. It just didn't mesh with the rest of my style. So when I found some Ikea hack inspiration via google, I decided to give it a go.

before

Source

I like it as an island, but it needed more character
* Unfortunately, I slacked at getting pictures of the process, but I will explain it below *

After


So there you have it. Overall, I am happy with how it turned out. I would have liked the wood stain to be a little bit lighter, but I still think it looks much better than the original.

The Process:

      Materials
  • miniwax dark walnut stain (or any color stain you want)
  • white spray paint (at least 2 cans)
  • paint brushes
  • miniwax polyshades (gloss)
  • wood conditioner
Day One:
  1.  cover everything but the top cutting board. For this I used garbage bags and tape, but you could use anything.
  2. apply your first light layer of stain
Day Two:

     1. apply your second layer of stain

Day Three:

     1. apply your wood conditioner first and then miniwax polyshade wood sealant (I did not do this step because I was in a rush, but it makes ALL the difference. I need to go back and do this as soon as I find the time).

Day Four:

1. Cover the stained part and spray paint the bottom of the cart with white spray paint. 
2. Apply the first layer, wait an hour, and apply the second
3. Let dry for 3 hours 

Voila! You're done! What do you think?

xx,
W


Tuesday, March 4, 2014

DIY Decorative Ladder

Sorry for my extremely long hiatus. I have been busy basking in newlywed bliss and pouring myself into work, projects and grad school applications. Truthfully, I miss blogging and sharing the fun things I have been working on. I will most likely bombard the blogging world with many updates in the coming days and hopefully instill some decorative inspiration in some of you. Pay it forward, if you will, as my inspiration comes from countless other blogs I read daily.

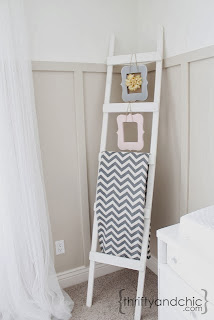
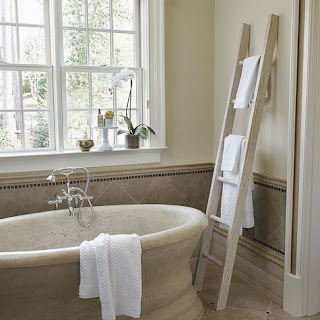
Over the summer, I became obsessed with this decorative ladder trend (is it still a trend?) and after weeks of online shopping failures, decided to try and make one on my own. Much to my surprise, it was a lot easier than I thought it would be.

Here are some of the photos that inspired my decision:


I love the idea of using a decorative ladder for towels, but there isn't enough space in our bathroom so my plan was to make one for the living room to hold magazines and blankets. I bought all of the materials from Home Depot and ended up spending around $40, which, compared to buying one, is really inexpensive. I will now attempt a step by step ladder building tutorial. Bear with me as this is my first one. They will get better...promise!

* Disclaimer: This ladder is great for displaying magazines or hanging blankets, but if you want something more sturdy or to use as a shelf, this is not the ladder for you *

Let's get started, shall we?

Materials:

- two 7' boards. (Mine were about 4" wide I think, but width is entirely up to you)
- five 1" dowels (I wanted the ladder to be wider at the bottom so I ending up taking an inch off each dowel. The bottom is 22" and the top one is 18")
- one 1" wide bit
- can of miniwax in ebony stain (if desired)
- can of white paint (if desired - it doesn't matter which one. I'll leave that up to you)
- paint brushes
- guerrilla glue (if you have the patience)
- super glue (if you are like me and don't want to wait forever for it to dry)
- sand paper (if desired)

The Process:

Step One - starting from top, I measured (and marked) 12" between each dowel. This will leave about 2" of space at the bottom without any dowels. If you want more space in between your dowels and less space on the bottom I recommend spacing the dowels 14" or 15" apart. 


Step Two - once I measured where the dowels would go, I drilled 1/2" holes using the 1" wide bit. (Be careful not to drill through the board!)


Step Three - Arrange the dowels in the correct order. Put a dab of super glue in the bottom drilled hole and place the dowel in the drilled hole. Repeat all the way up the ladder.

Step Four - *This step needs to be done quickly. It is possible to do alone, but not recommended* Put super glue in ALL of the drilled holes on the other side of the ladder and quickly and carefully line up the other side of the ladder and push the dowels into the glue. Warning: lining them up may be difficult.
Alternative: If you have the patience you can replace with Gorilla Glue, but make sure you have something to keep both sides of the ladder and dowels connected while it dries.

Unfortunately I don't have pictures of this process because I did it alone and it was a time sensitive step, but here are some pictures of the finished (pre-stained/painted) ladder.


Step Five - This part can be omitted if you want the plain pine look. I knew I wanted it to be grey(ish) so I chose to use a dark stain (miniwax in ebony). Since it's a dark stain, I only used one coat.


Step Six - Once the stain is on, I would wait about an hour before applying paint. Since I wanted the grey(ish) distressed look, I diluted white paint with water (about 1 part paint to 1 part water). I lightly brushed the diluted white paint all over the ladder. You can put as much or as little paint as you want. I added about 2 light coats.


Step Seven - If you want a more distressed look, you can lightly sand certain parts. I did not do this step, because it looked distressed enough from the diluted paint, but it's an option!

Step Eight - Always enlist the help of your pets!


Step Nine - Adorn your ladder with magazines, blankets, towels...whatever you want! 

Here are some finished pictures of the ladder.


Let me know what you think!

XX,

W